Window Installation Guide: Cost, Steps, & Tips
2023 Window Installation Guide: Cost, Steps, and Tips
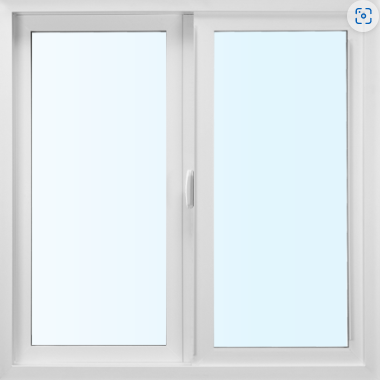
Window Installation Tips an Expert Window Company in Portland, OR
Factors Affecting Cost of Window Installation in Portland, OR
There are a lot of things that can affect how much it costs to install new windows in Portland. One big factor is the size of the window. If you have really big windows, it's going to cost more to install them because they require more materials and take longer to put in. Another thing that can affect the cost is the type of window you choose. There are lots of different types of windows, like double-hung windows or casement windows, and some are more expensive than others. The material the window is made out of can also make a difference in price. Vinyl windows tend to be cheaper than wood windows, for example. The condition of your home can also affect the cost. If your house is old and needs a lot of repairs before the windows can be installed, that will add to the overall cost.
Window Product Quality
When it comes to window installation, it can be overwhelming with the sheer number of options available in the market today. With so many window manufacturers producing their products, it is crucial to take the time to compare different options and do thorough research based on reviews. This will help you find reputable products that meet your specific needs.
One important factor to consider when comparing window products is their energy efficiency. Energy-efficient windows can help you save money on your energy bills by reducing heat transfer and preventing drafts. Look for windows that have a high energy efficiency rating, such as those with the ENERGY STAR certification. These windows are designed to meet strict energy efficiency guidelines set by the Environmental Protection Agency (EPA). Another aspect to consider is the type of window material used. Common materials include vinyl, wood, aluminum, and fiberglass. Each material has its own advantages and disadvantages. For example, vinyl windows are known for their durability and low maintenance requirements, while wood windows offer a classic and natural look. Aluminum windows are lightweight and resistant to corrosion, while fiberglass windows are highly durable and provide excellent insulation.
Window Styles
In addition to considering the material, it is also important to think about the style of window that best suits your home. There are various styles available, including double-hung, casement, sliding, and awning windows. Double-hung windows are popular for their versatility and ability to open from both the top and bottom sashes. Casement windows, on the other hand, open like a door with hinges on one side, providing excellent ventilation. Sliding windows slide horizontally along a track, making them ideal for spaces with limited vertical clearance. Awning windows are hinged at the top and open outward, allowing for ventilation even during light rain.
Warranty Offered by Window Manufacture
Lastly, make sure to consider the warranty offered by the window manufacturer. A good warranty can provide peace of mind knowing that you are protected in case of any defects or issues with the product. Look for a warranty that covers both the window itself and the installation. Finally, the company you hire to do the installation can impact the price. Some companies charge more for their services than others, so it's important to shop around and get quotes from different places. If your located in Portland, OR and looking for a reputable company to upgrade your home windows give us a call today.
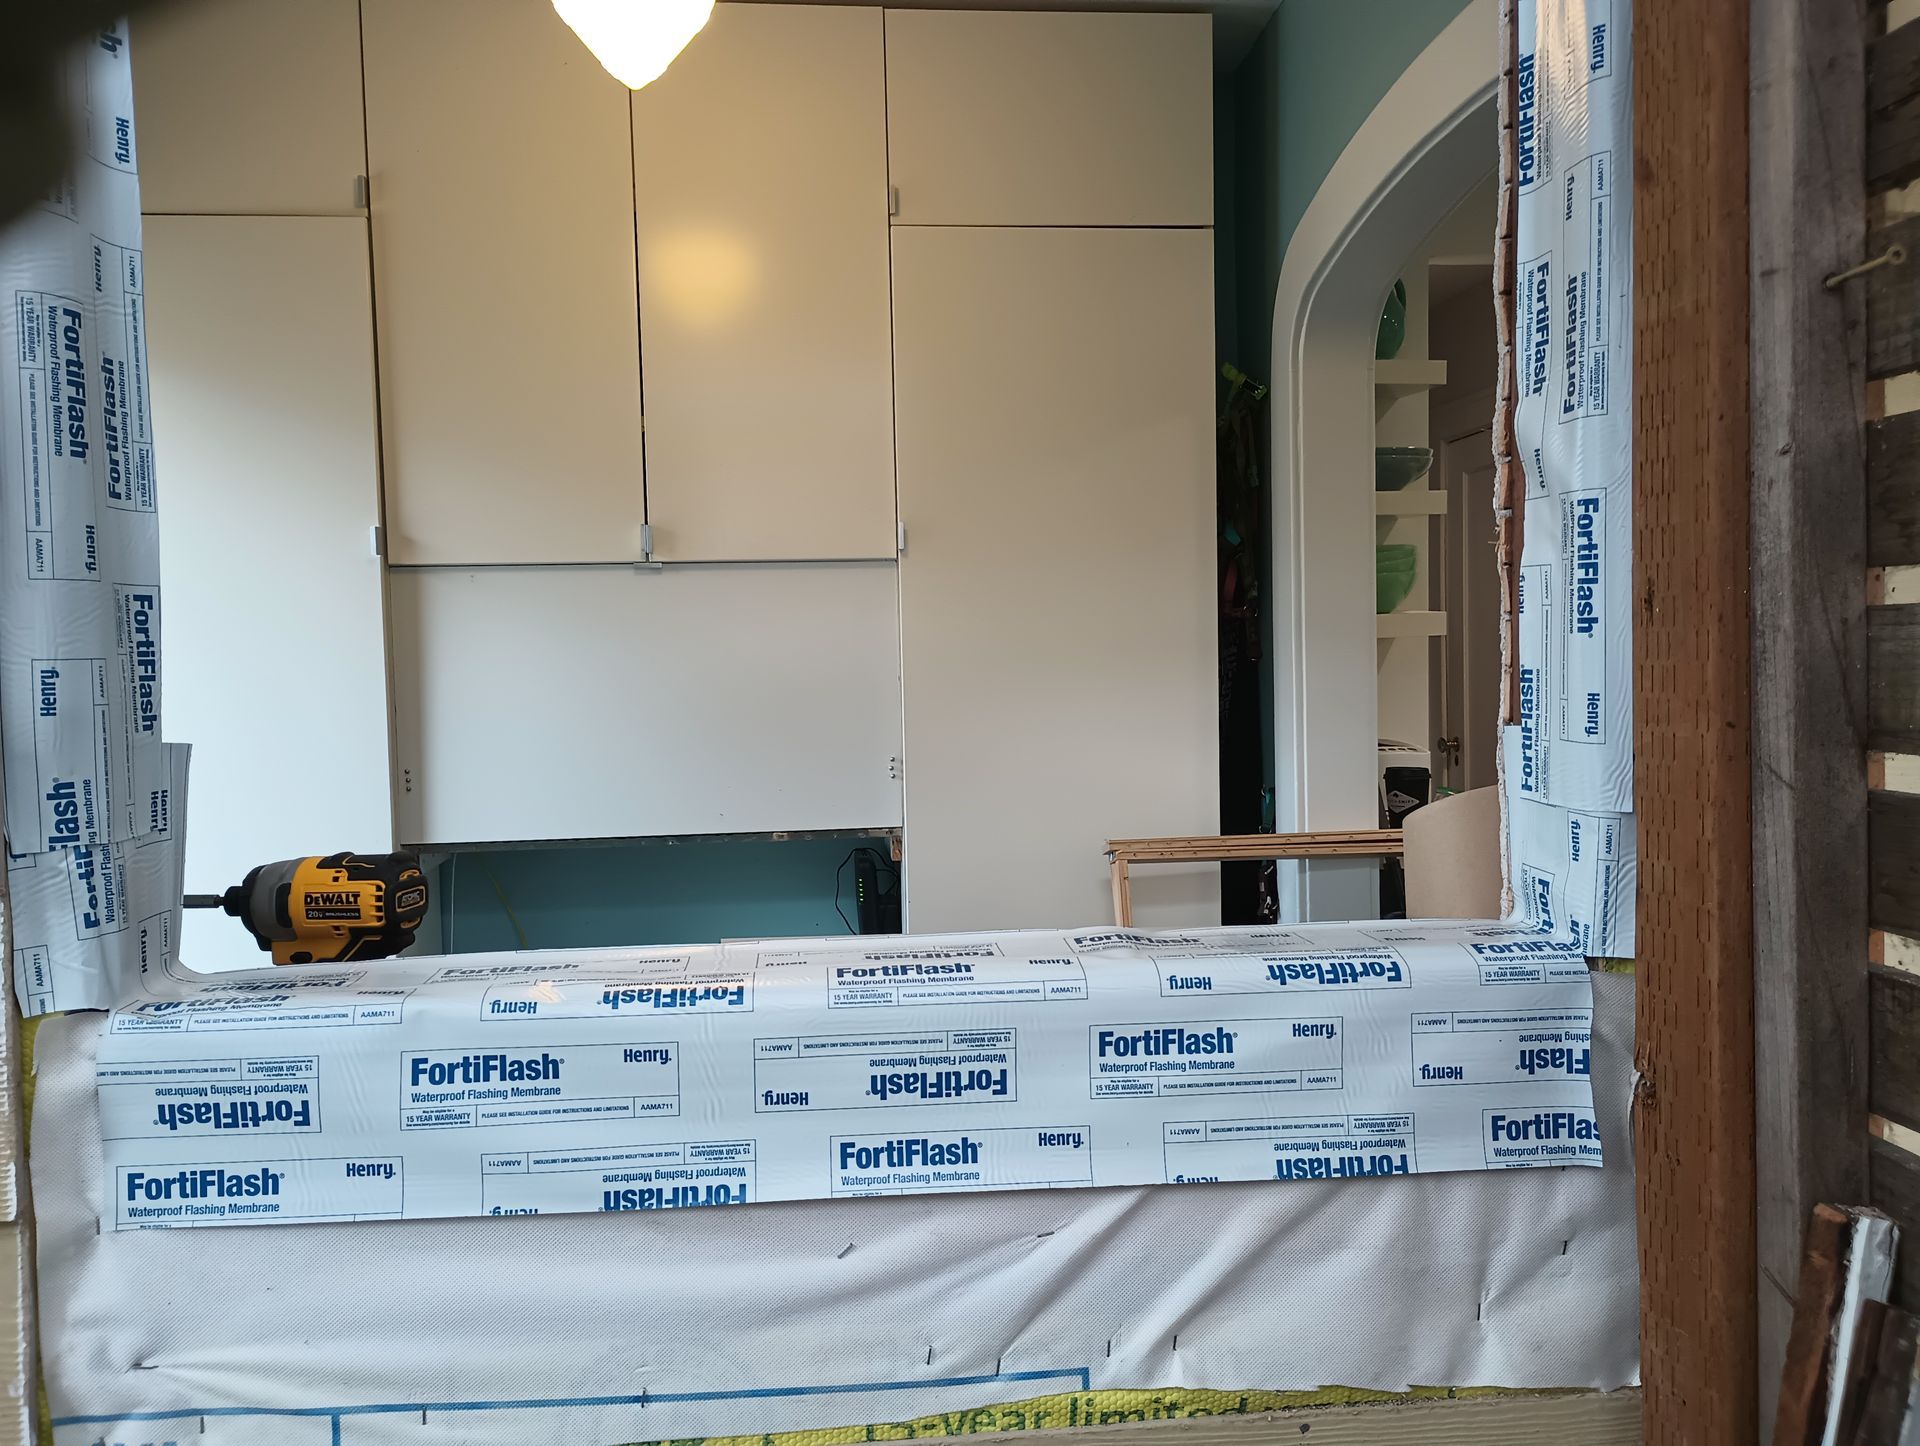
Properly Folding and Taping Flaps for Window Installation
Installing windows may seem like a daunting task, but with the right techniques, it can be a breeze. One crucial step in window installation is properly taping and folding flaps to ensure a secure and tight seal.
Step-by-step Guide to Taping and Folding Flaps
- Prepare the flaps: Before you begin taping and folding the flaps, make sure they are clean and free from any debris or dust. This will ensure better adhesion of the tape.
- Apply the tape: Start by applying an adhesive tape along each flap edge. Use a high-quality tape that is specifically designed for window installations to ensure maximum durability.
- Fold the flaps inward: Gently fold each flap inward towards the center of the window frame. Take care not to crease or damage the flaps during this process.
- Secure with additional tape: Once folded, apply another layer of tape over the folded flaps to reinforce their position. This will provide extra strength and prevent any potential air or water leaks.
- Trim excess tape: After securing the flaps with additional tape, trim any excess tape using a utility knife or scissors. This will give your installation a neater appearance while maintaining its effectiveness.
Tools Required for Taping and Folding Flaps
To properly execute this task, you'll need several tools at hand:
- Adhesive tape: Choose a high-quality adhesive tape designed explicitly for window installations.
- Utility knife or scissors: These tools will help you trim excess tape neatly.
- Clean cloth: Use it to wipe down the flap edges before applying the adhesive tape.
Importance of Secure Flaps in Window Installation
Securely taping and folding flaps is crucial for a successful window installation. It ensures that the window remains firmly in place, preventing any potential air or water leaks. By creating a tight seal, you can enhance energy efficiency within your home and maintain a comfortable indoor environment.
Tips for Achieving a Tight Seal with Taped Flaps
To achieve an optimal seal when taping and folding flaps, consider the following tips:
- Cleanliness is key: Before applying tape, ensure that the flap edges are clean and free from dirt or debris.
- Apply even pressure: When folding the flaps inward, apply even pressure along the entire length to avoid any gaps.
- Use adequate tape: Ensure that you use enough tape to cover the entire flap edge thoroughly.
- Smooth out any wrinkles: Take care to smooth out any wrinkles or bubbles in the tape as you apply it for maximum adhesion.
By following these guidelines, you can ensure that your window installation is not only aesthetically pleasing but also functional and efficient.
Sealing and Insulating the Window: Sides, Top, and Backer Rod
Proper sealing and insulation of windows is crucial for maintaining energy efficiency in your home.
Techniques for Sealing
Top, and backer rod of a window, there are several effective techniques you can employ. One popular method is using foam insulation strips or weatherstripping. These materials provide an airtight seal that prevents drafts from entering your home. Simply measure the dimensions of your window frame and cut the strips accordingly before attaching them to the side jambs and head jamb.
Another technique involves using caulk to seal any gaps or cracks around the window frame. Silicone-based caulks are highly recommended due to their durability and flexibility. Apply a thin bead along the edges where the window frame meets the wall, ensuring a tight seal that prevents air leakage.
Suitable Sealants
Choosing the right sealant is essential for effective window insulation. Consider these options:
- Silicone Caulk: Ideal for sealing gaps between different types of materials such as glass and wood or metal frames.
- Butyl Rubber Caulk: Provides excellent adhesion properties and is resistant to extreme weather conditions.
- Acrylic Latex Caulk: A versatile option suitable for both indoor and outdoor applications.
Each type of sealant has its own advantages depending on factors such as climate conditions, window frame material (such as fiberglass or wood), or whether you have double pane windows.
Benefits of Proper Sealing
Properly sealed windows offer numerous benefits beyond just energy efficiency. Here are some advantages you can expect:
- Energy Savings: By eliminating drafts and air leaks, sealed windows help maintain a consistent indoor temperature, reducing the need for excessive heating or cooling.
- Enhanced Comfort: Sealed windows prevent cold air from seeping in during winter and hot air during summer, ensuring a comfortable living environment year-round.
- Noise Reduction: Effective sealing minimizes outside noise infiltration, providing a quieter and more peaceful atmosphere indoors.
- Improved Durability: Sealing protects your window frames from moisture damage, prolonging their lifespan.
Precautions When Applying Sealants
While applying sealants during window installation, it is important to take certain precautions to ensure proper adhesion and avoid any mishaps:
- Clean Surface: Thoroughly clean the window frame before applying any sealant to remove dirt, dust, or old caulk residue.
- Proper Ventilation: Ensure adequate ventilation when working with sealants as some products may emit fumes that can be harmful if inhaled excessively.
- Follow Manufacturer's Instructions: Read and follow the instructions provided by the sealant manufacturer for optimal application and drying time.
By following these precautions, you can achieve effective sealing without any complications.
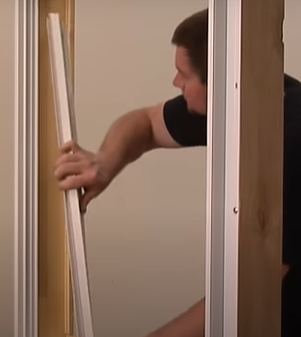
Straightening Jambs and Removing Jamb Liners for Window Installation
Before installing new windows, it is crucial to ensure that the jambs are straightened properly. Straight jambs provide a solid foundation for the window installation, preventing any future issues such as air leakage or water infiltration. Here are the steps to straighten jambs effectively:
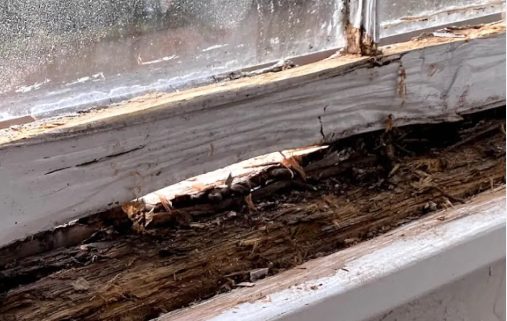
- Evaluate the condition of side jambs: Begin by inspecting the side jambs for any signs of damage or decay. If there is severe damage, it may be necessary to replace them entirely before proceeding with the window installation.
- Use a level and shims: Place a level against each jamb to determine if they are straight or not. If you notice any unevenness, insert shims at strategic points along the jamb to adjust its position until it becomes perfectly plumb.
- Secure jambs with screws: Once the jambs are straightened, secure them in place using screws. This will ensure that they remain in their proper position during and after window installation.
Removing jamb liners is another important step when replacing windows. Jamb liners are typically found on double-hung windows and serve as a guide for sashes to slide up and down smoothly. Here's why removing jamb liners is essential:
- Proper fit: When installing replacement windows, jamb liners can interfere with achieving a proper fit. Removing them allows for accurate measurements and ensures that the new windows align correctly within the frame.
- Preventing damage: Over time, jamb liners can become worn out or damaged due to constant use or exposure to moisture. Leaving deteriorated jamb liners in place can lead to further problems down the line, such as difficulty operating the windows or potential water leaks.
To successfully remove jamb liners without causing unnecessary damage, consider these tips:
- Carefully detach fasteners: Start by locating and removing any screws or fasteners that hold the jamb liners in place. Take your time and use appropriate tools to avoid damaging the surrounding wood or other window components.
- Gentle prying: Once the fasteners are removed, gently pry the jamb liners away from the window frame using a putty knife or a similar tool. Apply even pressure to avoid splintering or breaking the wood.
Cleanup and preparation: After removing the jamb liners, thoroughly clean up any debris or adhesive residue left behind. Prepare the window frame for installation by ensuring it is clean and free of any obstructions.
Caulking, Priming, and Painting the Window Opening
Caulking plays a crucial role in ensuring the security and durability of your window installation. By sealing any gaps or cracks around the window opening, caulking prevents water damage, air leaks, and potential energy loss. It creates a barrier that keeps moisture out, protecting your home from potential issues such as mold growth and structural damage.
Opt for a high-quality silicone-based product. Silicone caulks are durable, flexible, and resistant to harsh weather conditions. They adhere well to various surfaces like vinyl or wood frames commonly used in window installations.
Before applying caulk to the window opening, make sure it is clean and dry. Remove any old caulk or debris using a scraper or putty knife. Then apply the new caulk evenly along the edges of the window frame using a caulking gun. Smooth out the caulk with your finger or a caulk smoothing tool for a neat finish.
Priming is an essential step before painting your window opening as it enhances adhesion between the paint and surfaces. This ensures that your paint job lasts longer without peeling or chipping away easily. Use an appropriate primer based on the material of your window frame - whether it's wood, vinyl, or another type of material.
Once you have primed the surface, you can move on to selecting suitable paint colors for your window opening. Consider factors such as your home's exterior color scheme and personal preferences when making this choice. Lighter colors can help reflect sunlight and keep your home cooler during hot summer months while darker shades may add depth and contrast.
To achieve a smooth finish when painting the window opening:
- Start by taping off any areas you don't want to be painted.
- Use high-quality brushes or rollers designed for smooth surfaces.
- Apply thin coats of paint rather than thick layers to avoid drips or uneven coverage.
- Allow each coat to dry completely before applying the next one.
- Sand lightly between coats for optimal smoothness.
Remember, hiring professional window installation contractors can save you time and effort. They have the expertise and tools needed to complete the job efficiently while ensuring proper caulking, priming, and painting techniques are followed. Their labor costs may be compensated by potential savings in energy bills due to improved insulation and natural light flow through your windows.
Ensuring a Secure Inside Seal and Installing Inside Screws
One crucial aspect that should never be overlooked is ensuring a secure inside seal. This step plays a vital role in preventing air leakage, which can lead to energy inefficiency and uncomfortable drafts in your home. Installing inside screws properly is equally important to ensure the stability and longevity of your windows.
Importance of an Inside Seal in Preventing Air Leakage
A leaky window can significantly impact the comfort level of your home. It allows unwanted drafts to enter, making it difficult to maintain consistent temperatures indoors. By ensuring a secure inside seal during window installation, you can minimize air leakage and enhance energy efficiency.
To achieve an effective inside seal:
- Begin by thoroughly cleaning the window frame and removing any debris or old caulking.
- Apply a high-quality silicone-based or acrylic latex caulk around the perimeter of the frame where it meets the wall.
- Use a caulk gun to apply an even bead of caulk along the edges, ensuring complete coverage.
- Smooth out the caulk using a caulking tool or your finger for a neat finish.
By following these steps diligently, you can create an airtight seal that prevents air infiltration and improves insulation.
Step-by-Step Process to Install Inside Screws Securely
Installing inside screws is another critical aspect of window installation that requires careful attention. These screws play a crucial role in securing the window frame firmly into place, providing stability and durability.
To install inside screws effectively:
- Begin by aligning the screw holes on the window frame with those on the window opening.
- Insert each screw into its respective hole while holding the window firmly against the wall.
- Using an electric drill or screwdriver, tighten the screws gradually, ensuring they are secure but not overtightened.
- Repeat this process for all the remaining screws until the window is firmly attached.
Recommended Tools for Installing Inside Screws Effectively
To ensure a smooth and hassle-free installation process, it is essential to have the right tools at hand. Here are some recommended tools for installing inside screws effectively:
- Electric drill or screwdriver: Allows for quick and effortless screwing.
- Screwdriver bits: Ensure a proper fit between the screw heads and the tool.
- Level: Helps in aligning the window frame accurately.
- Tape measure: Ensures precise measurements for hole alignment.
By utilizing these tools, you can streamline the installation process and achieve optimal results.
Common Mistakes Made While Ensuring an Inside Seal
While ensuring an inside seal during window installation, certain common mistakes should be avoided to maintain its effectiveness. These include:
- Insufficient caulking: Inadequate coverage of caulk can result in air leakage around the frame.
- Improper cleaning: Neglecting to clean the frame thoroughly before applying caulk can hinder adhesion.
- Rushed application: Applying caulk hastily may lead to uneven coverage and compromised sealing.
To avoid these mistakes, take your time during each step of creating an inside seal to ensure a leak-free window installation.New Paragraph
Properly Taping Flaps and Flanges for Window Installation
Installing windows is a crucial part of any construction or renovation project. It not only enhances the aesthetics but also ensures energy efficiency and proper insulation. One critical aspect of window installation is properly taping flaps and flanges.
Step-by-step guide to taping flaps and flanges correctly
- Prepare the surface: Before starting the taping process, ensure that the surfaces are clean, dry, and free from any debris or dust particles. This will promote better adhesion of the tape.
- Measure and cut: Take precise measurements of the flaps and flanges to determine the length of tape required. Cut strips of tape accordingly, ensuring they are slightly longer than needed for an effective seal.
- Apply primer (if necessary): Some tapes require a primer to enhance adhesion on certain surfaces such as wood or concrete. Check the manufacturer's instructions to determine if primer application is necessary.
- Positioning: Carefully position the tape along the edges of both the flap and flange, ensuring it covers their entire length without any gaps or overlaps.
- Press firmly: Apply firm pressure along the entire length of the tape using your hand or a roller tool to ensure proper bonding with both surfaces.
- Seal corners: Pay special attention to corners where water infiltration is more likely to occur. Use scissors to create neat mitered corners for better sealing.
- Inspect for air bubbles or wrinkles: Smooth out any air bubbles or wrinkles that may have formed during taping by pressing them gently with your fingers or using a roller tool.
- Check for proper adhesion: After taping, inspect the flaps and flanges to ensure that the tape has adhered securely. If any areas seem loose or have poor adhesion, reapply tape as necessary.
Importance of properly sealed flaps and flanges in window installation
Properly sealed flaps and flanges play a vital role in ensuring a successful window installation. Here's why:
- Waterproofing: Sealed flaps and flanges prevent water infiltration, which can lead to costly damage such as rotting wood, mold growth, or compromised insulation.
- Energy efficiency: Airtight seals created by correctly taped flaps and flanges minimize air leakage, reducing energy loss through drafts. This helps maintain a comfortable indoor temperature while lowering heating and cooling costs.
- Sound insulation: Well-sealed windows effectively reduce outside noise pollution, creating a quieter living or working environment.
Tips for achieving a watertight seal with taped flaps and flanges
To achieve a watertight seal when taping your window's flaps and flanges, consider the following tips:
- Use high-quality adhesive tapes specifically designed for window installations.
- Ensure surfaces are clean, dry, and free from dust or debris before applying tape.
- Apply firm pressure along the entire length of the tape to ensure proper bonding.
Pay extra attention to corners where water infiltration is more likely to occur.
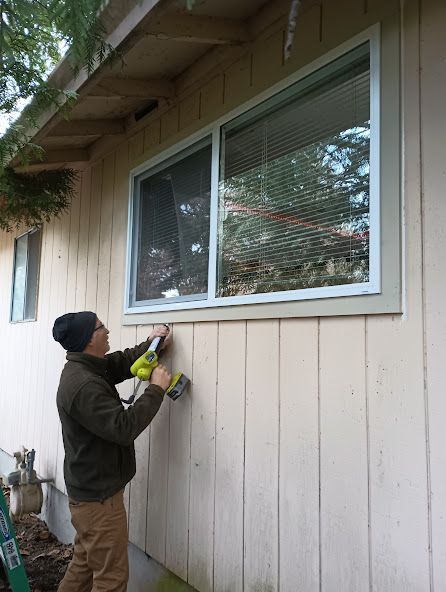
Cutting Out the Opening for Window Installation
Cutting out the opening for window installation is a crucial step in ensuring a successful and precise installation process. Whether you are replacing an old window or installing a new one, it is essential to follow the right techniques, use the correct tools, prioritize safety precautions, and avoid common mistakes.
Techniques for cutting out the opening accurately
To achieve accurate results when cutting out the window opening, consider these techniques:
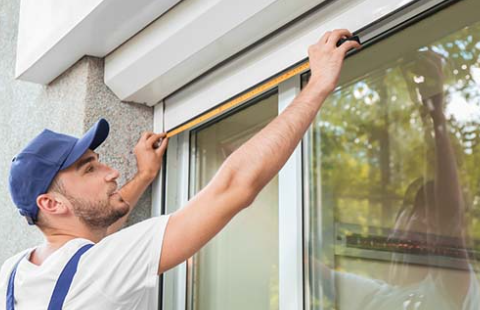
- Measurements: Begin by measuring the dimensions of your replacement window or new construction frame. Double-check these measurements before proceeding with any cuts.
- Marking: Use a pencil or marker to mark the outline of your window's opening on both the interior and exterior walls. This will serve as your guide throughout the cutting process.
- Cutting Tools: Depending on your specific project requirements, you may need different cutting tools such as reciprocating saws, circular saws, or oscillating multi-tools. Choose a tool that suits your needs and ensures clean and precise cuts.
- Cutting Sequence: Start by making small pilot holes at each corner of your marked outline using a drill or rotary tool. Then connect these holes by creating straight cuts along each side of the marked area.
- Controlled Approach: Take your time while cutting and maintain control over the tool to prevent any accidental damage to surrounding areas or personal injury.
Tools required for cutting out the window opening
Having the right tools at hand can make all the difference in achieving accurate cuts during window installation:
- Reciprocating saw
- Circular saw
- Oscillating multi-tool
- Drill or rotary tool
- Measuring tape
- Pencil or marker
- Safety goggles
- Dust mask
- Work gloves
By using these tools correctly and following proper techniques, you can ensure smooth and precise cuts while minimizing potential errors.
Safety precautions to consider during the cutting process
Prioritizing safety is essential when undertaking any construction project, including window installation. Here are some crucial safety precautions to keep in mind:
- Protective Gear: Wear safety goggles, a dust mask, and work gloves to shield yourself from flying debris and potential respiratory hazards.
- Secure Work Area: Clear the area around the window opening from any obstacles or clutter that could cause accidents or hinder your movement.
- Power Tool Safety: Familiarize yourself with the operating instructions for each tool you use, ensuring proper handling and safe usage throughout the cutting process.
- Electrical Hazards: Be cautious of electrical wiring or cables hidden within walls before making any cuts. Turn off power sources if necessary and consult a professional if unsure.
- Ladder Safety: If working at heights, ensure your ladder is stable and secure before climbing it. Use caution while carrying tools up or down the ladder to prevent accidents.
Common mistakes to avoid when cutting out the window opening
To prevent unnecessary setbacks during window installation, be aware of these common mistakes and take steps to avoid them:
- Inaccurate Measurements: Double-check all measurements before making any cuts to ensure a proper fit for your replacement window.
- Rushed Cutting: Take your time during the cutting process to maintain control over the tools and minimize errors.
- Ignoring Safety Precautions
Sill Sloping, Flashing, and Shim Installation for Windows
Importance of Proper Sill Sloping in Preventing Water Damage
Proper sill sloping is crucial, especially in areas prone to heavy rainfall or snow. Without adequate slope, water can accumulate on the sill and seep into your home, leading to costly water damage and potential mold growth.
To ensure proper sill sloping, follow these steps:
- Start by measuring the width of the window opening from inside.
- Cut a piece of pressure-treated lumber or composite material that matches the measurement.
- Securely attach the sloping piece to the bottom of the window opening using screws or nails.
- Use a level to check if the slope is sufficient for water drainage away from your home.
- Adjust as necessary until you achieve an appropriate angle.
Remember that different types of windows may require specific techniques for sill sloping. For casement windows, jalousie windows, skylights, or sliding windows, consult manufacturer guidelines or seek professional advice.
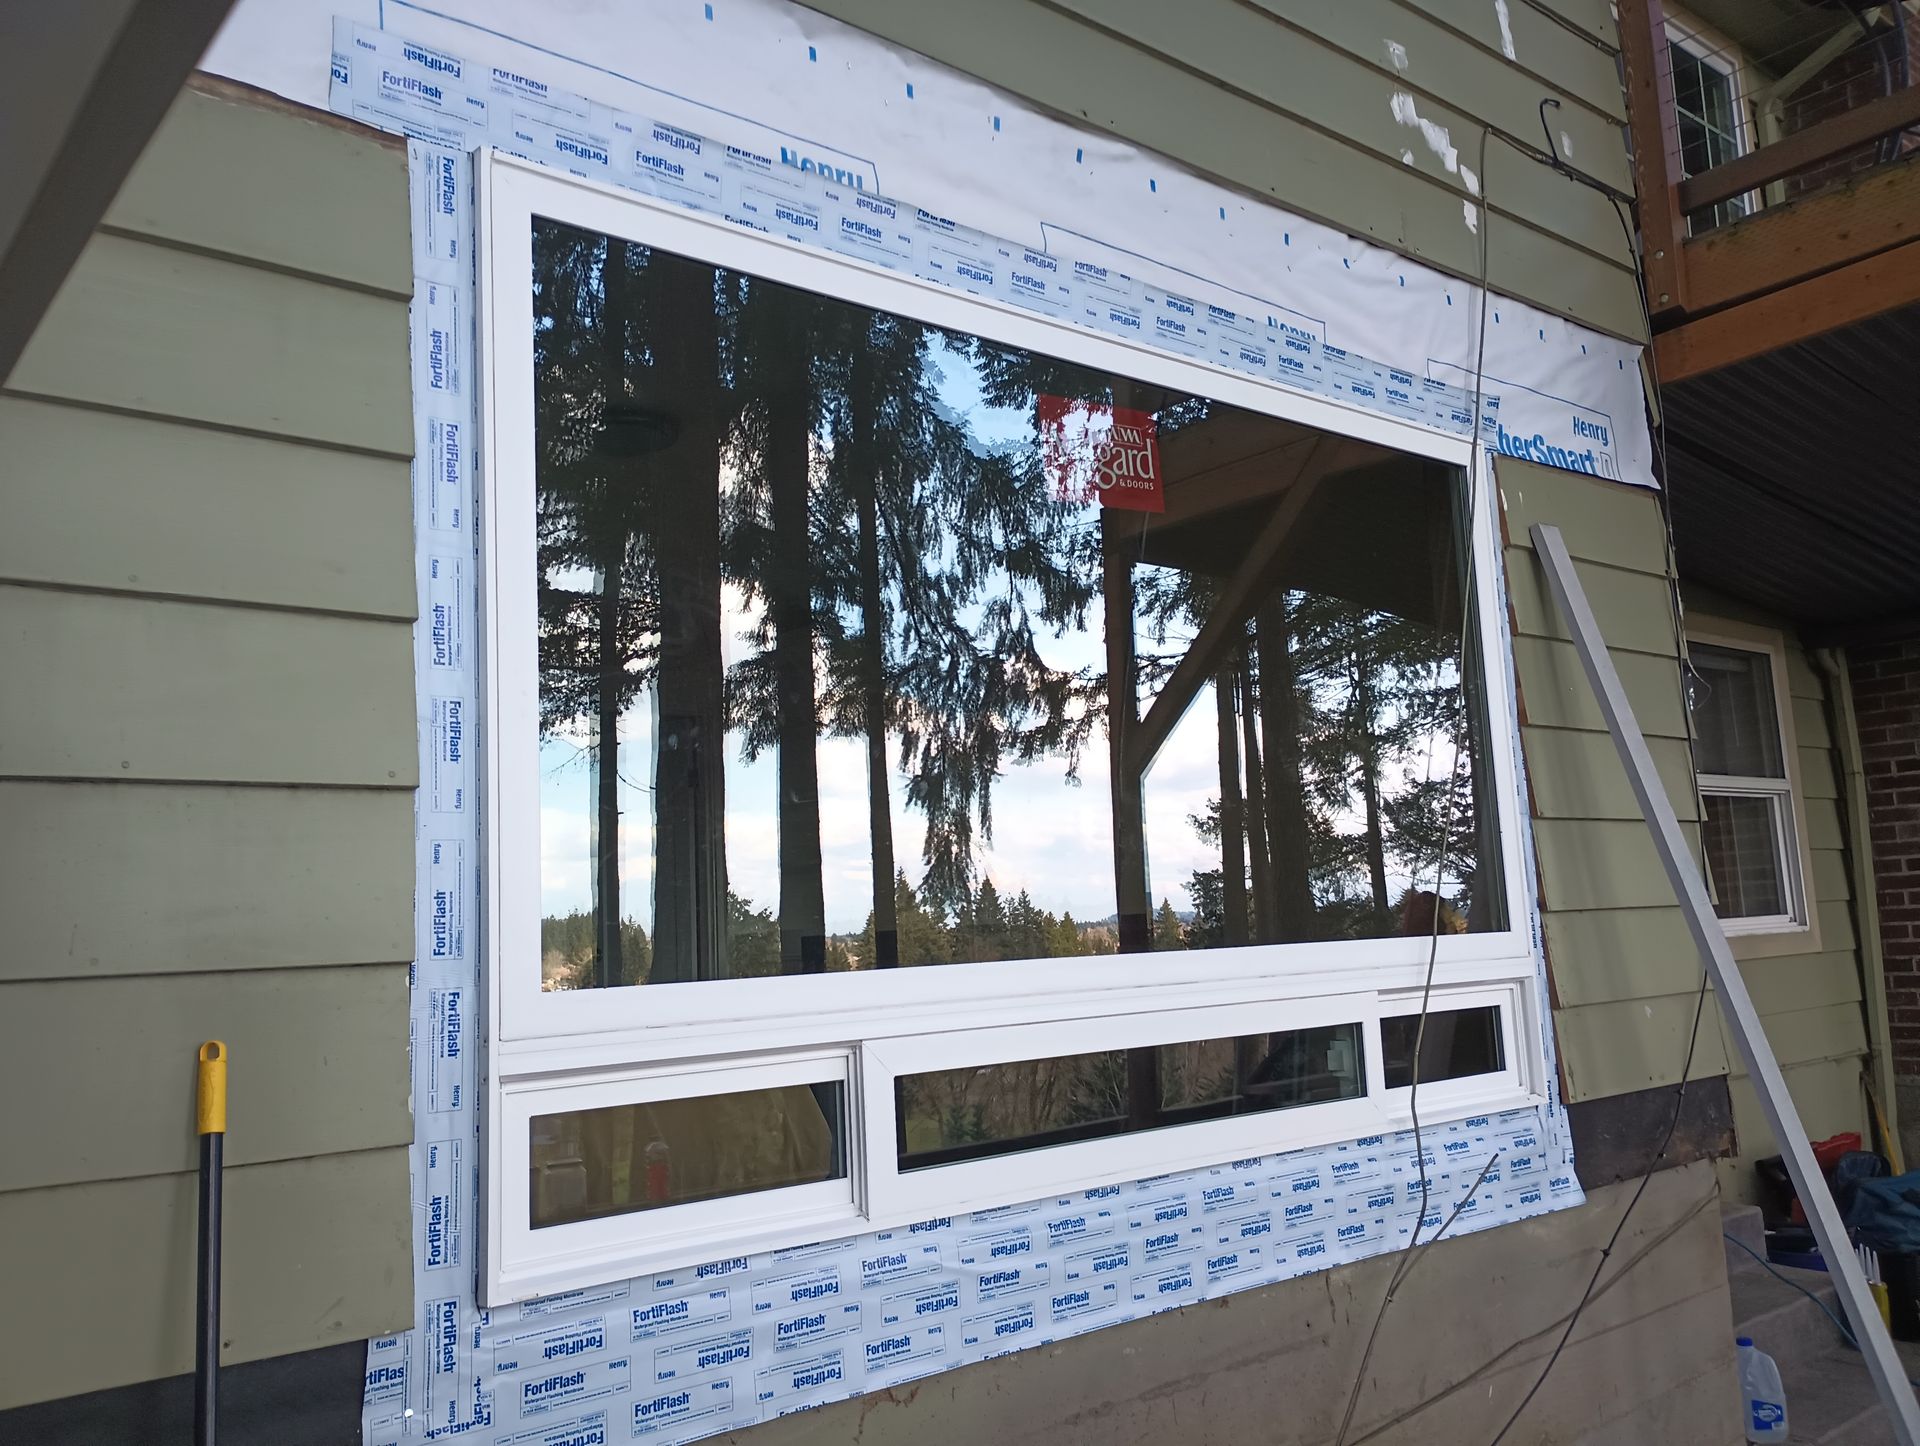
Step-by-Step Guide to Flashing Installation around Windows
Flashing plays a vital role in preventing water infiltration around windows. It acts as a barrier between the window frame and surrounding surfaces such as walls or roofs. Here's how you can install flashing effectively:
- Clean the surface where you will be installing flashing to ensure proper adhesion.
- Measure and cut pieces of flashing material according to your window dimensions.
- Apply a layer of adhesive sealant on both sides of the window frame where flashing will be placed.
- Carefully position one end of the flashing against the side of the window frame and press it firmly into place.
- Extend the flashing along each side of the frame while overlapping each piece by at least two inches.
- Securely fasten the flashing using roofing nails or staples at regular intervals.
- Apply additional adhesive sealant over the top of the flashing to create a watertight seal.
Remember to choose flashing materials suitable for your specific window type and local climate conditions. Consult with professionals or refer to manufacturer recommendations for the best results.
Role of Shims in Ensuring a Level and Secure Window Installation
Shims are essential for achieving a level and secure window installation, especially in older houses where walls may not be perfectly straight. They help fill gaps between the window frame and rough opening, ensuring stability and proper operation. Follow these steps when using shims:
- Place the window into the rough opening, making sure it is centered.
- Insert shims between the window frame and rough opening at various points along the sides and bottom.
- Use a level to check if the window is plumb and level.
- Adjust shims as needed until you achieve an even distribution of weight across all shims.
- Securely fasten the window to the framing using screws or nails through designated holes in the frame.
When selecting shims, opt for durable materials such as composite or plastic that won't compress over time, compromising your installation.
Conclusion: Key Points on Window Installation
In conclusion, proper window installation is crucial for ensuring the longevity and efficiency of your windows. By following the key points outlined in this guide, you can ensure a successful installation process.
Firstly, it is important to tape and fold flaps properly during window installation to prevent any air or water leakage. This step helps create a tight seal and enhances the overall insulation of your windows.
Sealing and insulating the sides, top, and backer rod of the window is another critical aspect. This ensures that no drafts or moisture can penetrate through gaps, providing better energy efficiency and protection against external elements.
Straightening jambs and removing jamb liners are necessary steps to ensure a precise fit during window installation. This helps maintain structural integrity while allowing for smooth operation of the windows.
Caulking, priming, and painting the window opening not only enhance its aesthetic appeal but also provide an additional layer of protection against weather elements. These steps help seal any remaining gaps for optimal insulation.
To secure an inside seal, installing inside screws is essential. This adds extra stability to your windows while preventing any potential movement or shifting over time.
Properly taping flaps and flanges further reinforces the seals around your windows. It helps eliminate any potential weak spots that could compromise their performance.
Cutting out the opening accurately is crucial for achieving a proper fit during window installation. Precise measurements ensure that your windows sit securely in place without any unnecessary gaps or misalignments.
Sill sloping, flashing, and shim installation are vital aspects. These measures help redirect water away from the frame while providing structural support.
In summary, following these key points will result in a successful window installation process that maximizes energy efficiency, durability, and aesthetics. Remember to consult professional installers if needed for guidance tailored to your specific situation. My Window Man in Portland, Oregon is your expert Window Replacement Company.
FAQs
Q: How long does window installation usually take?
A: The duration of window installation can vary depending on factors such as the number of windows, their size, and the complexity of the project. On average, it can take anywhere from a few hours to a full day.
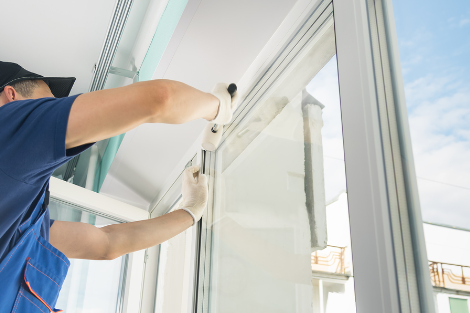
Q: Can I install windows myself or should I hire a professional?
A: While it is possible to install windows yourself, hiring a professional installer is recommended for optimal results. They have the expertise and specialized tools to ensure proper installation and minimize potential issues.
Q: Are there any specific maintenance tasks required after window installation?
A: Regular maintenance tasks such as cleaning the glass, lubricating moving parts, and inspecting seals are important to prolong the lifespan of your windows. Refer to the manufacturer's guidelines for specific recommendations.
Q: Will installing new windows help with energy efficiency?
A: Yes, installing new windows can significantly improve energy efficiency by reducing drafts and heat transfer. Look for ENERGY STAR certified windows that meet strict performance criteria for enhanced energy savings.
Q: What are some signs that indicate it's time for window replacement?
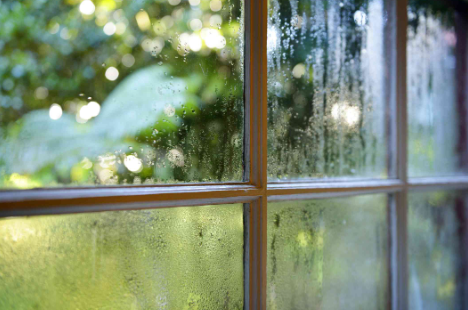
A: Signs that indicate it may be time for window replacement include increased energy bills, difficulty opening or closing windows, condensation between panes, drafts or air leaks, or visible damage such as rot or decay.
Remember to consult with professionals in your area for accurate advice tailored to your specific needs and circumstances.
Looking for a Local Fence Company in Portland, OR? Follow the text link to contact one of our team members who deals in expert fence installation.
Looking for a Christmas light Installation Company in Portland, OR? Follow the text link to contact one of our experts who deals in Holiday Lighting in the Portland Metro area.